In this tutorial adapted from The MPC Bible 3, we'll take a snippet from a vocal sample and use the new 'Slice Motion' feature to create a randomised strutter effect, enhanced with plenty of FX and automation.
Loading The Vocal Sample
Download the files for this tutorial, unzip and transfer the folder 'Slice Motion Tutorial Files' to your MPC disk. If you need help transferring content to your standalone MPC disk, check out my Installing MPC Bible Project Files article.
Start with a new blank project in your MPC using [MENU] > NEW PROJECT. Go to [BROWSER] > Places, navigate inside the 'Slice Motion Tutorial Files' folder and locate the WAV sample, Enila Agony:

If you can't see it, make sure the 'Samples'' filter is enabled. Press LOAD TO POOL to load this sample into memory and go to [SAMPLE EDIT] to view it:

This is a vocal sample by an artist called Enila who has kindly offered it under a Creative Commons license.
Editing & Slicing The Sample
Let's isolate a short phrase from this sample. First, hold down [SHIFT] and set 0 SNAP to ensure we land on a 'zero crossing point'.

Now adjust the START point of the sample to isolate the phrase towards the very end which contains the phrase 'I chose to live'.
There are several ways to change the START point in MPC3 (I cover all options in great detail in the MPC Bible 3), but generally speaking I prefer to use the (Q-LINKS) for most sample edits. To quickly move the START point over towards the region near the end of the sample, use (Q-LINK 13):

You can also use the touchscreen to move START (and END points) across large distances; simply drag the green 'S' across the screen. Then use (Q-LINK 5) and (Q-LINK 1) to make the final smaller adjustments.
Press and hold pad [A05] to preview your edits and tweak until you are happy with the result. What's interesting about this sample is that the initial 'I' is completely merged with the previous word so there isn't really a 'perfect' distinct start point here, but luckily for the purposes of this tutorial it really doesn't matter at all. Let's just use a START point of 403032:

To simplify this tutorial I'm going to use PROCESS > Discard to remove the unneeded sample data, but you could also use PROCESS > Extract to create a separate sample made from the currently selected region.
Now head over to [SAMPLE EDIT] > CHOP. Select REGIONS: 32

This 'non-destructively' divides our sample into 32 equal regions. Hit some pads to preview the slices, they are mapped across [BANK A] and [BANK B] - there's no need to edit any of the slices here as we'll be dealing with any clicks and pops later using the amp envelope within our DRUM track.
Setting Up The Sequence
With the 32 slice markers set, head back to [MAIN] and set a sequence tempo of 90.00 BPM and BARS: 4. Depending on the default project structure in your particular MPC model, either select an existing 'unused' DRUM track or hit +NEW TRACK to create a brand new DRUM track.
Hold down on the default track name until the TRACK SETTINGS dialog appears:

Use the keyboard icon to rename the track Sliced Vocal.

How hold down the physical [NOTE REPEAT] button so the TIME DIVISION options appear at the bottom of MAIN:

Tap on 1/16 to enable 1/16th note repeats - we'll be using this to easily preview our slice motion experiments.
Configuring Slice Motion
Go to [TRACK EDIT] > SAMPLES and select pad [A01]. Assign the Enila Agony sample to LAYER 1. Set SLICE: 1

Hold down [NOTE REPEAT] while also holding down pad [A01]. You'll hear that, as expected, only slice 1 of our chopped sample plays every time the pad is triggered. Now hit the SLICE MOTION icon:

SLICE MOTION is a new MPC3 feature that means a pad layer is no longer limited to only playing one specific slice; instead it can be configured to play a different slice each time the pad is triggered. First, set MOTION: Increment, with CYCLES: All.

Use [NOTE REPEAT] to continually trigger pad [A01]. Now instead of repeatedly playing 'slice 1', pad [A01] plays a different slice from our chopped 'Enila Agony' sample on each pad trigger.
MOTION: Increment means slice playback is entirely incremental, initially starting from slice 1, then slice 2, slice 3, and so on. After triggering slice 32 it starts the entire cycle again, back at slice 1.
Change CYCLES to 9 and use [NOTE REPEAT] on pad [A01] - this time you'll hear that the pad starts at slice 1, then triggers the next 9 slices, and then jumps back to slice 1, and repeats the cycle. This way you've limited the cycle range to only playing slices 1 to 10.
Now set SLICE to 21 and continually hit pad [A01] and you'll hear that the playback now starts at slice 21 and then triggers the next 9 slices from slice 21. Here you've restricted the slice motion range to slices 21 to 30.
Set MOTION to Random and set SLICE to 1 and CYCLES: ALL

Hold down [NOTE REPEAT] and pad [A01] - now things get even more interesting, as this time slice motion is triggering slices within the specified cycle range in a completely random way.
Adjusting the Amp Envelope
It's all very 'raw' sounding at the moment, so let's head over to [TRACK EDIT] > ENVELOPES to make some adjustments to the ATTACK and DECAY of the amp envelope to help reduce the clicks that occur at the start and end of each sliced region:

Just a small amount of ATTACK will do the trick, try ATTACK: 7. When it comes to DECAY, the higher the value here, the more 'staccato' the sound, giving a very clipped, 'stutter'. For the moment, try a DECAY: 72 - we can further tweak these later once we've added some FX.
Now go back to TRACK EDIT > SAMPLES and change the SEMI to -5:

This suddenly transforms the timbre of the voice, giving it a deeper, darker vibe. Notice the 'KEY' of this sample layer has now been calculated as 'B' - this is going to be important for the next part of the tutorial!
Adding Vocal Tuner
As we've 'micro chopped' this vocal sample into tiny portions of vocal, it's inevitable that we're going to get some chops that, when isolated, sound slightly 'out of tune'. If you'd like to ensure the pitch of every chop is perfectly tuned to 'concert pitch', we'll need to use some FX.
Go to [MAIN], expand the XL Channel Strips, and select the FX tab:

Tap on the + for INSERT SLOT 1 and insert an instance of 'Vocal > AIR Vocal Tuner'. Tap on the insert box to open the FX settings for this plugin:

Vocal Tuner will literally 're-tune' a vocal performance in real time. It can be used to ensure each individual note is perfectly tuned to 'concert pitch' (REFERENCE: 440.0 Hz) but can also change the entire key and scale of the vocal performance.
We know from the KEY setting in TRACK EDIT that the vocal sample is in the KEY of B, so set KEY:B in the Vocal Tuner to match this.
Now hold down pad [A01] and the [NOTE REPEAT] button so the slices begin to randomly cycle. While it does, change the SCALE from Major to Minor - now the Vocal Tuner will subtly tune all our vocal chops to the B Minor scale instead of B Major.
The difference between 'B major' and 'B minor' is just one note; a B major scale contains a D#, while B minor has a D, giving it a more melancholy feel. So whenever Vocal Tuner encounters a 'D#' note in your vocal, it simply changes it to a D.
As these are very short chops you'll definitely want to keep the RETUNE TIME quite short as you want the plugin to re-tune notes as quickly as possible. You could even set RETUNE TIME to 1 ms for a rapid re-tune; normally on a vocal performance this might sound a little artificial, but should be fine on our small chopped slices and will hopefully add extra flavour to the overall effect. You can leave all other settings at the defaults.
Adding More FX Plugins
Tap the top left arrow to return the the XL CHANNEL STRIPS and in INSERT 2, add an instance of Delay/Reverb > AIR Diff Delay. Try the following settings to add some nice ethereal ambience:

Then use EQ/Filter > LP Filter Sweep to add a subtle moving filter sweep to the chops - this is effectively the Light LP Sweep preset with the DRY/WET turned down a little:

It's okay to use presets! Most FX plugins feature some great presets that at the very east provide a good starting point for your own tweaking.
Let's add some Modulation > Autopan Sync to create a slow 'back and forth' pan of the stuttered slices:

Recording The Vocal Stutter
Let's lay down a quick 'performance' of our vocal stutter in [MAIN].
First make sure the red REC ARM button is enabled, and if you'd like a 1 bar count in, enable the METRONOME - you can use the shortcut [SHIFT] and [PLAY START] to toggle the metronome on and off.
We'll use the 1/16 timing correct settings we configured earlier in this tutorial (hold down [NOTE REPEAT], press the 1/16 button on screen). I also suggest you turn off the [FULL LEVEL] button to allow you to vary the velocity of your pad repeats.
Hit [REC] and [PLAY START] and get ready to hold down [NOTE REPEAT] and pad [A01] together during the 1 bar metronome count-in.
You can either just record a continuous 1/16th pattern over all four bars, or take your finger off pad [A01] from time to time to add some additional space between some of the repeats. Remember, as you have [FULL LEVEL] off you can also try varying the velocity by applying different pressures to the pad.
Go to [MENU] > [BROWSER] and from the 'Slice Motion Tutorial Files' folder, load the project Slice Motion Vocal.xpj. If you cannot see the project file, make sure the 'Projects' filter is enabled:

Here, Sequence 1 ('Basic Stutter') features a simple four bar 'note repeat' recording of the vocal stutter. Go to GRID VIEW to see the events:

Hit [PLAY START] to listen to the recording. With the random slice motion events there's already plenty going on here to grab the listeners' attention, but let's add a little more variety with some simple envelope automation.
Adding Envelope Automation
Head back to TRACK EDIT > ENVELOPES, and with your sequence still playing, try adjusting the amp envelope DECAY to a variety of different values in real time. Remember you can drag the red 'decay' circle on the amp envelope to easily manipulate the decay value using the touchscreen:

What's interesting here is that as you adjust the DECAY back and forth from 0 to 127 in real time it creates some really interesting changes to the stuttering sound, giving you a mix of very short staccato sounds and longer, drawn out 'legato' sounds.
We can easily record these real time changes to the DECAY parameter using automation. To do this we must first set the global automation mode to 'write' .
If your MPC model has a dedicated [AUTOMATION] button you can press this to turn on write mode. Otherwise to turn on automation writing in TRACK EDIT, drag the 'pull down' menu from the very top of the screen and tap on the Automation icon so it turns red:

Automation is written to our sequence without the need to enter 'overdub' mode, so simply press [PLAY START] and begin changing the DECAY parameter to values back and forth in the range 0 to 127. Once the sequence has played all four bars, press [STOP].
If you mess up at any point, hit [ERASE] and select AUTOMATION:

You can now use PARAMETER to erase specific automation types. For example, to erase all the decay events you just wrote, select PAD: Amp Env Decay.
When you are finished, remember to set AUTOMATION back to READ.
You could also do the same with the ATTACK value as well - varying this will effectively change the 'softness' of each slice.
You can hear my version by selecting sequence 2 ('Automation') - here I've included some automated attack changes as well. I've also recorded some additional instrumentation on tracks 2, 3 and 4 using various stock plugins (Bassline, TubeSynth and DrumSynth), just to put the vocal stutters into a more musical context. You can see these additional tracks more clearly in the ARRANGE screen:

We look at how to set up and record sequences with the stock instrument plugins throughout the MPC Bible 3 course, where they are used alongside your own custom-built drum kits and keygroup instruments to create complete, multitrack songs. We also delve much deeper into the automation side of the MPC, utilising custom Q-LINK macros to control complex, multi-parameter automation changes throughout your arrangements.
MPC Bible 3: The Complete MPC3 Firmware Course
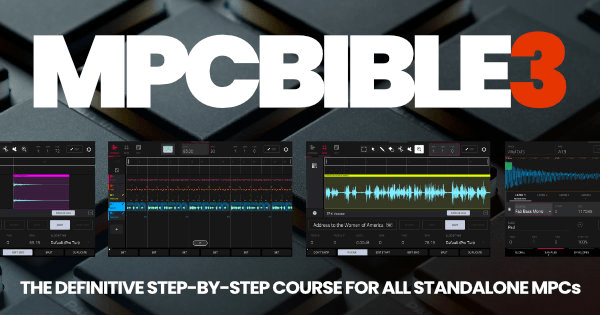
There's hundreds more tutorials, tips, tricks and creative MPC3 workflows in my fully structured MPC3 firmware course, The MPC Bible 3. Packed with over 1000 pages of hands-on, practical tutorials, it's the most complete and up-to-date course available for all modern standalone MPCs.


Latest Posts
Vintage Organs 3: Now With Advanced Keygroups & Q-LINK Macros
"Piano Suite 3 - Now With MPC Sample & MPC3 Support
Pro Studio Kit 3.5 - Now With MPC Sample & MPCe Pad Support
Electric Bass 3 - Now With MPC Sample & MPC3 Support
MPC Bible 3, Revision 6 - MPC Oscillators, MPC 3.9, MPC One G2 + MPC Key 37 G2