
In this MPC One, MPC X, MPC Key and MPC Live tutorial (adapted from my MPC tutorial course, The MPC Bible), I’m going to transform an innocent clap sample into a thick and gnarly beast of a clap using nothing but the tools available in a standard MPC DRUM program.
Loading The Basic Clap
Firstly, download the tutorial files, then unzip and transfer the ‘Clap From Hell Tutorial Files’ folder to your MPC disk. The easiest way to do this is to enter ‘controller’ mode and transfer the files to an SD card or USB stick, but you can also copy them to an internal SATA drive if you have one installed.
For more information on how to transfer files to your MPC One, MPC Live, MPC Key or MPC X, check out my ‘Standalone MPC File Transfers’ guide over at MPC-Samples.com.
With the tutorial files now transferred to an attached MPC disk, create a new blank project; to do this go to MENU > NEW PROJECT. Back in MAIN, you’ll see the default blank DRUM program, ‘PROGRAM 001’, is assigned to the DRUM PROGRAM row:
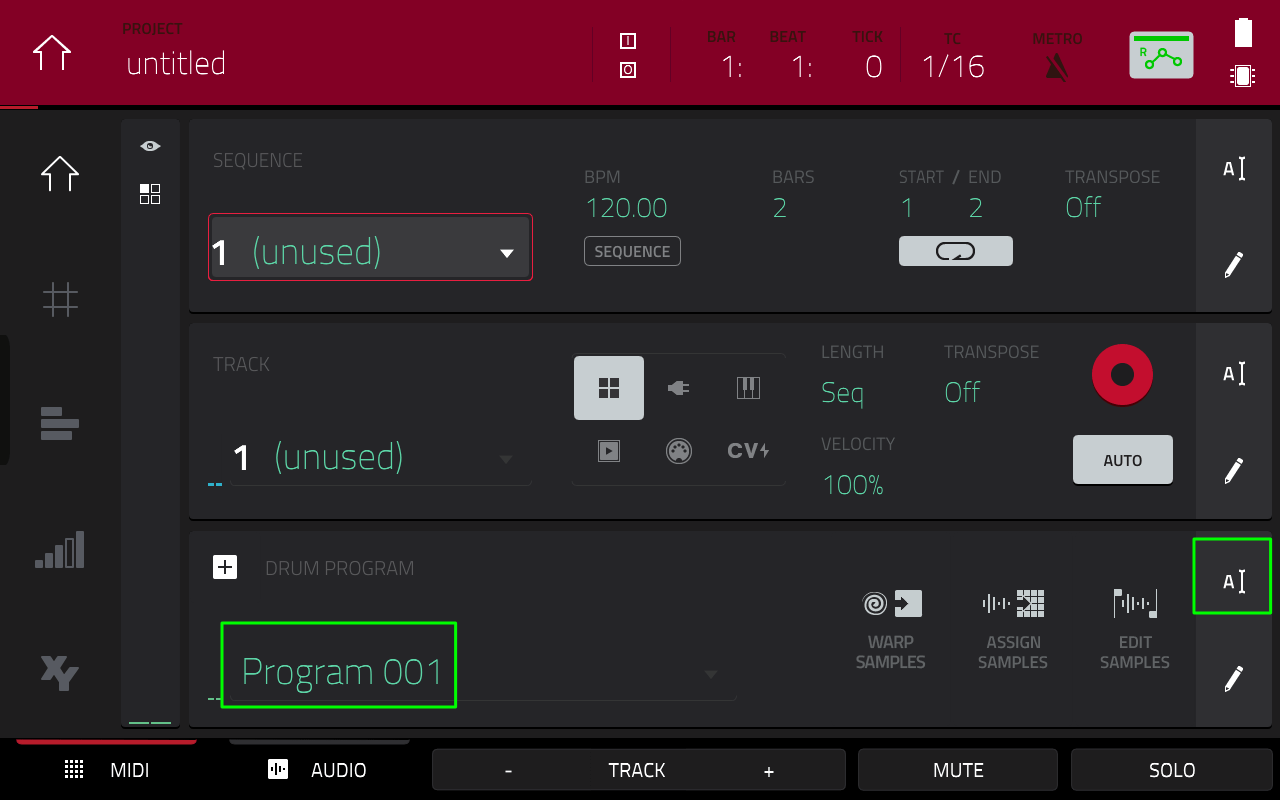
Tap the ‘A’ icon at the end of the row to bring up the on-screen keypad; rename this program to ‘Clap From Hell’.
Go to the BROWSER, select Places and navigate to the disk where you transferred the ‘Clap From Hell Tutorial Files’ folder (in my example I’m using an SD card called MPC DATA). Now double click the ‘Clap From Hell Tutorial Files’ folder to enter it.

Make sure the ‘browser filter’ at the top of the screen is set to ‘Samples or ‘All Files’.
Press pad A01 so it lights up in green – this tells the MPC that the next sample loaded should be assigned to pad A01. Double tap the classic-clap sample in the BROWSER to load it directly to pad A01 (alternatively, single tap the sample and press the LOAD button).
Setting up The Layers
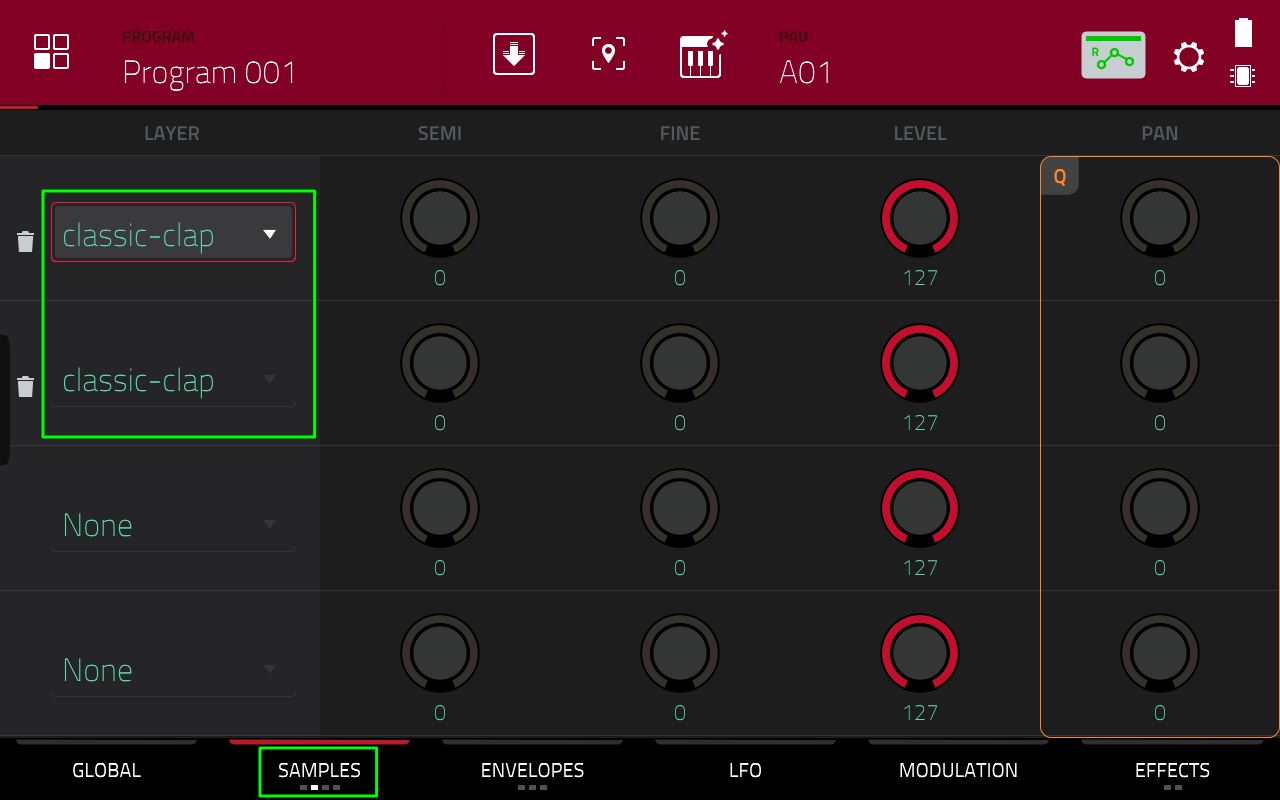
Go to PROGRAM EDIT and press the SAMPLES button at the bottom of the screen – with A01 still selected you should see the following:
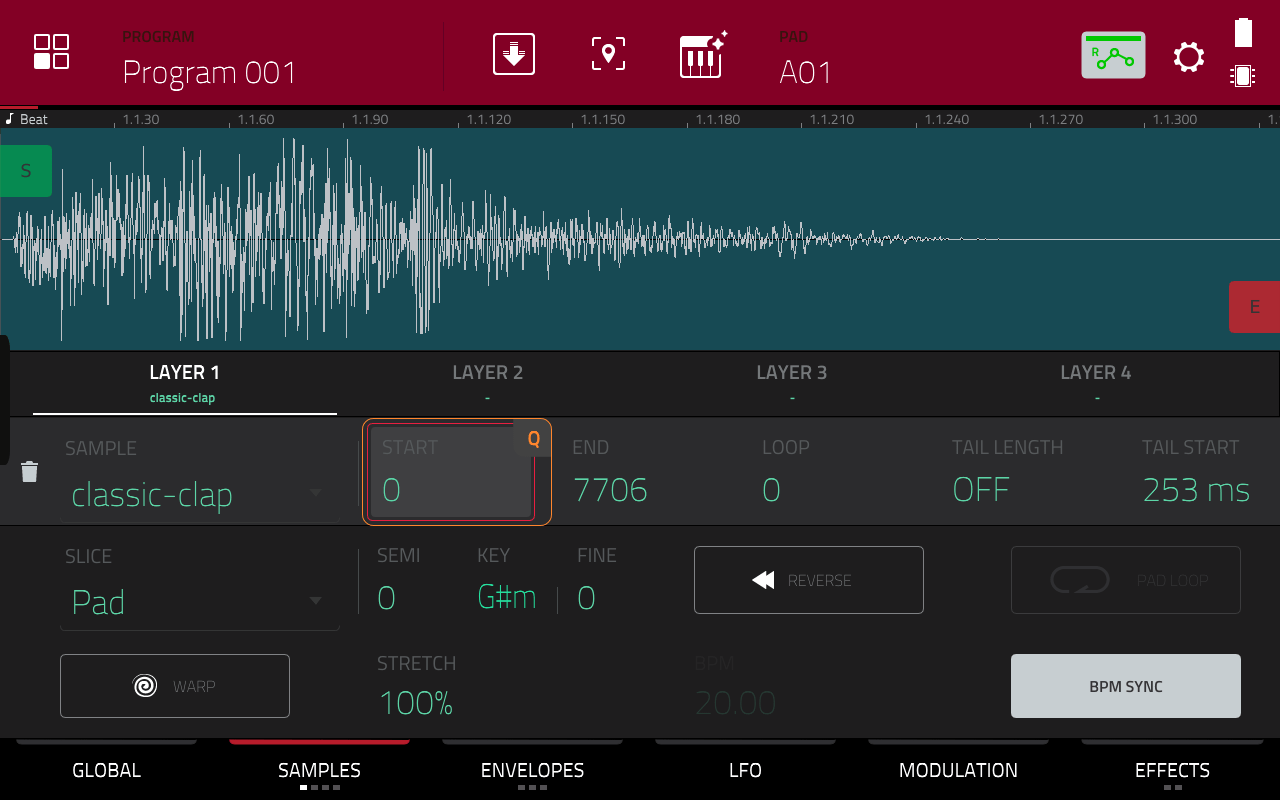
Hit A01 to have a listen to our clap. It’s a very standard clap sound, nothing special, but we’ll soon change all that.
Let’s assign a second copy of this clap to LAYER 2 of our pad. First, single tap the LAYER 2 ‘tab’:
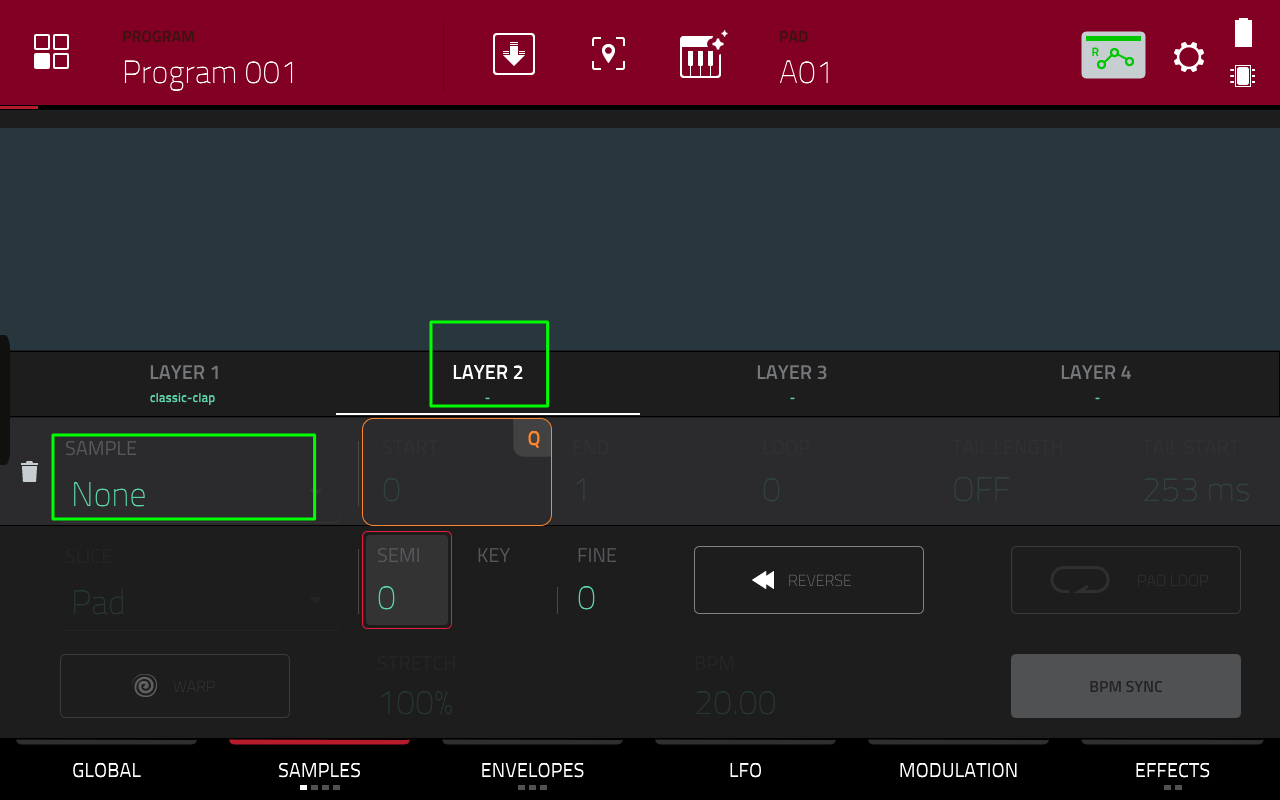
Tap in the SAMPLE field and turn the data wheel clockwise (or hit the + button) to change this from ‘None’ to ‘classic-clap’.
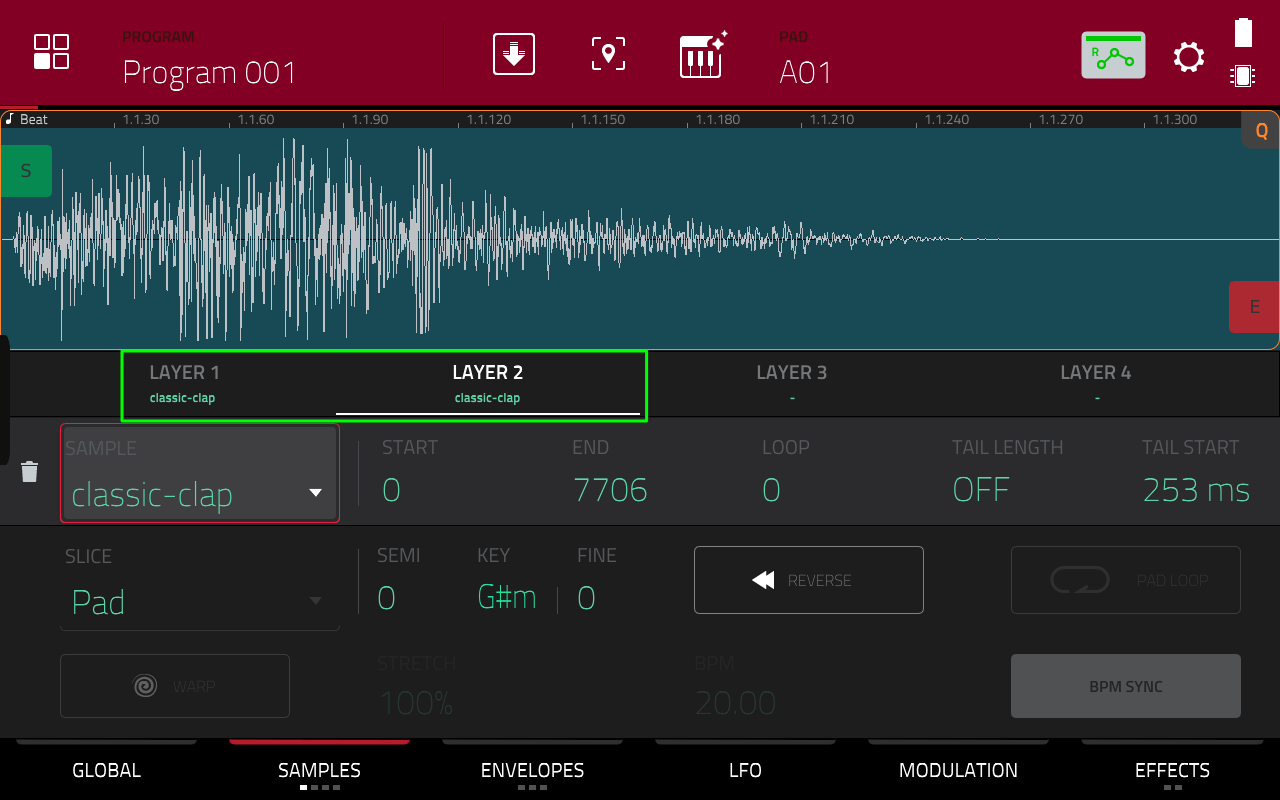
Alternatively you can assign samples to multiple layers in the second SAMPLES screen. Notice how the ‘Samples’ tab has four dots underneath?

This indicates that there are three additional ‘SAMPLES’ pages available each with their own unique set of parameters – to access the second SAMPLES screen, simply press SAMPLES once again:
Here it’s more clear how the samples are currently stacked on top of each other, so when it comes to initially layering your samples you can choose whichever interface you find more intuitive.
Panning & Tuning The Layers
The next stage is to start applying program parameters to differentiate the two duplicate layers and create stereo width.
The last column in the SAMPLES screen lets us adjust the PAN for each clap layer. The default PAN value of ‘0’ places a layer bang in the centre of the stereo field; a negative value pans it to the left and a positive value pans it to the right.
Single tap the PAN parameter for LAYER 1 and turn your datawheel anticlockwise to set it to -15 (slight left pan). Now set the PAN for LAYER 2 to +15 (slight right pan).
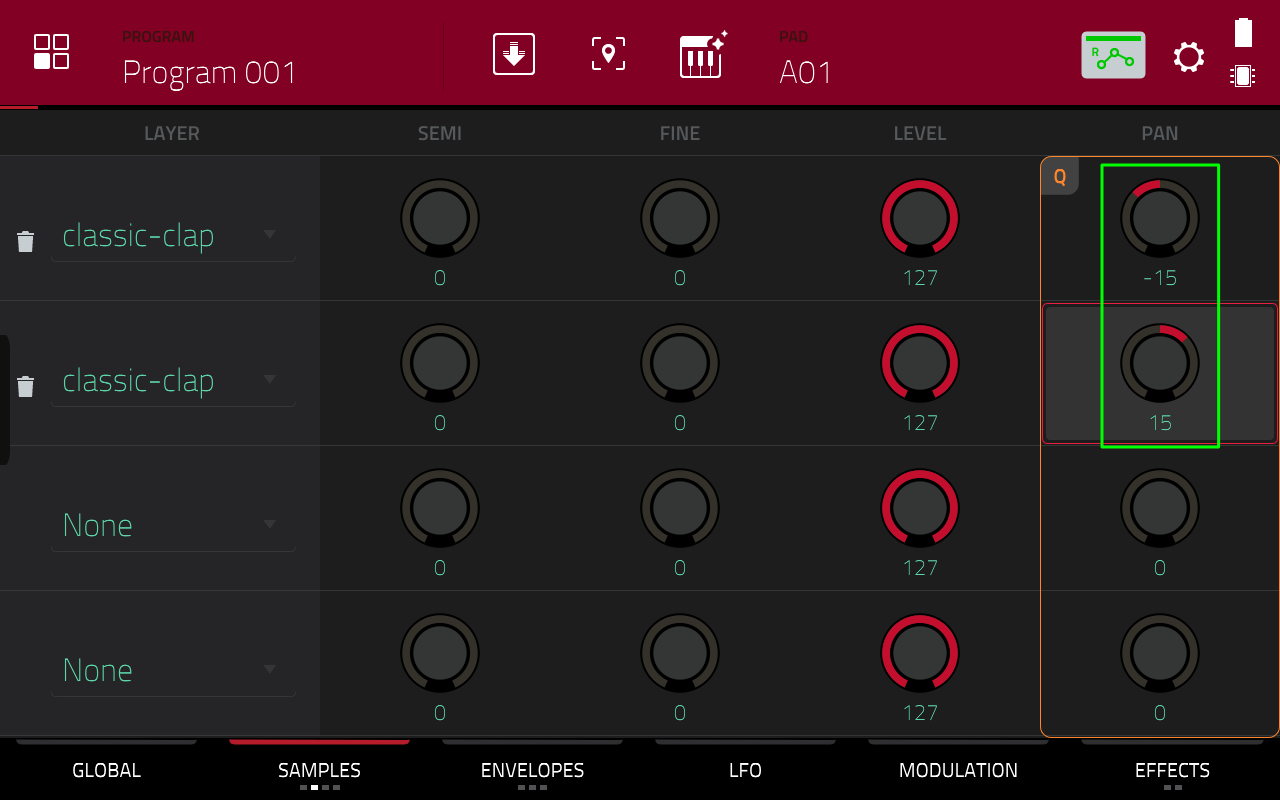
Hit pad A01 to preview what our panned layered clap currently sounds like; by panning each layer to opposites sides of the stereo field we’ve given the clap a bit more width and presence. You can experiment with the amount of panning to change the overall stereo ‘width’ of the clap.
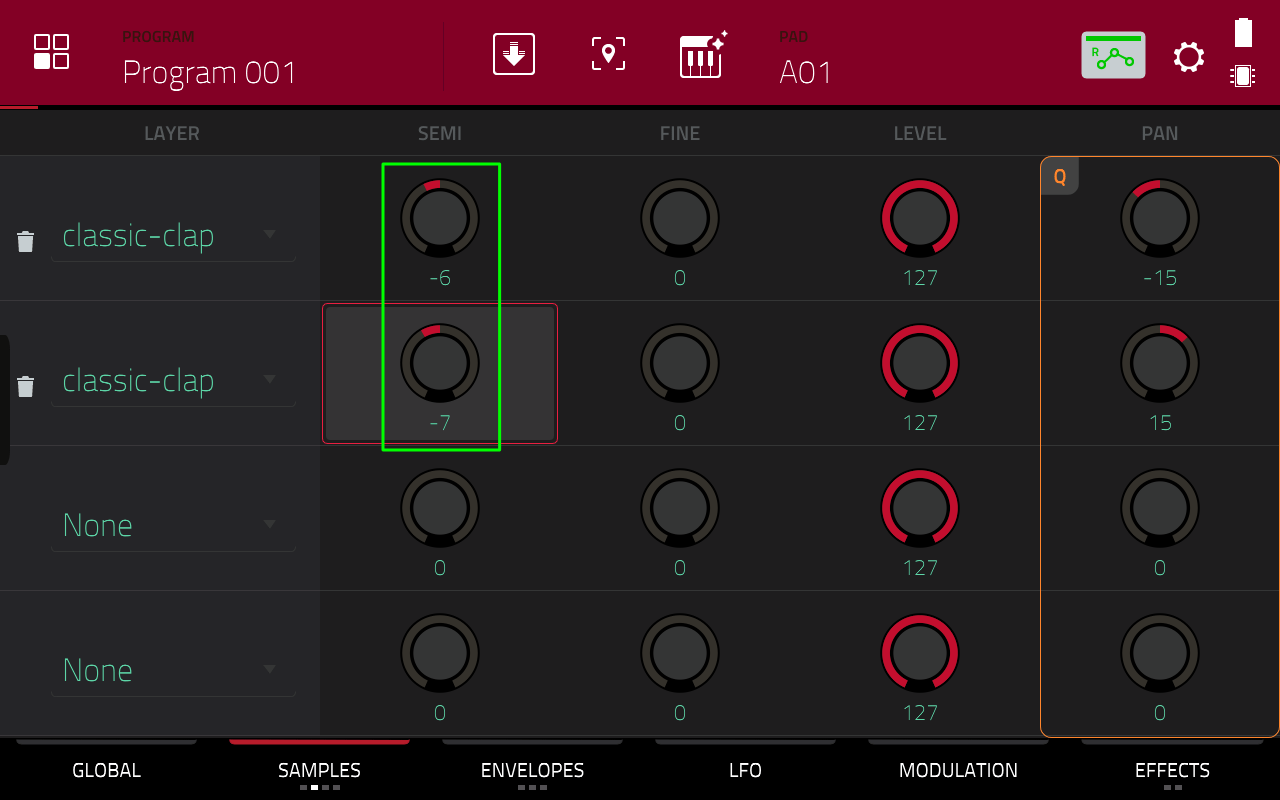
Now turn your attention to the ‘SEMI’ column. The SEMI parameter controls the pitch of each layer. Lowering the SEMI value will tune down our clap to give it a darker feel.
Tap the SEMI value for LAYER 1 and set it to -6. Now adjust the SEMI dial for LAYER 2, but this time set it slightly differently to -7. The reduced tuning gives the clap a darker, grittier vibe, and by using slightly different tunings on either side of the stereo field we enhance the overall stereo effect.
Applying The Pad Offset
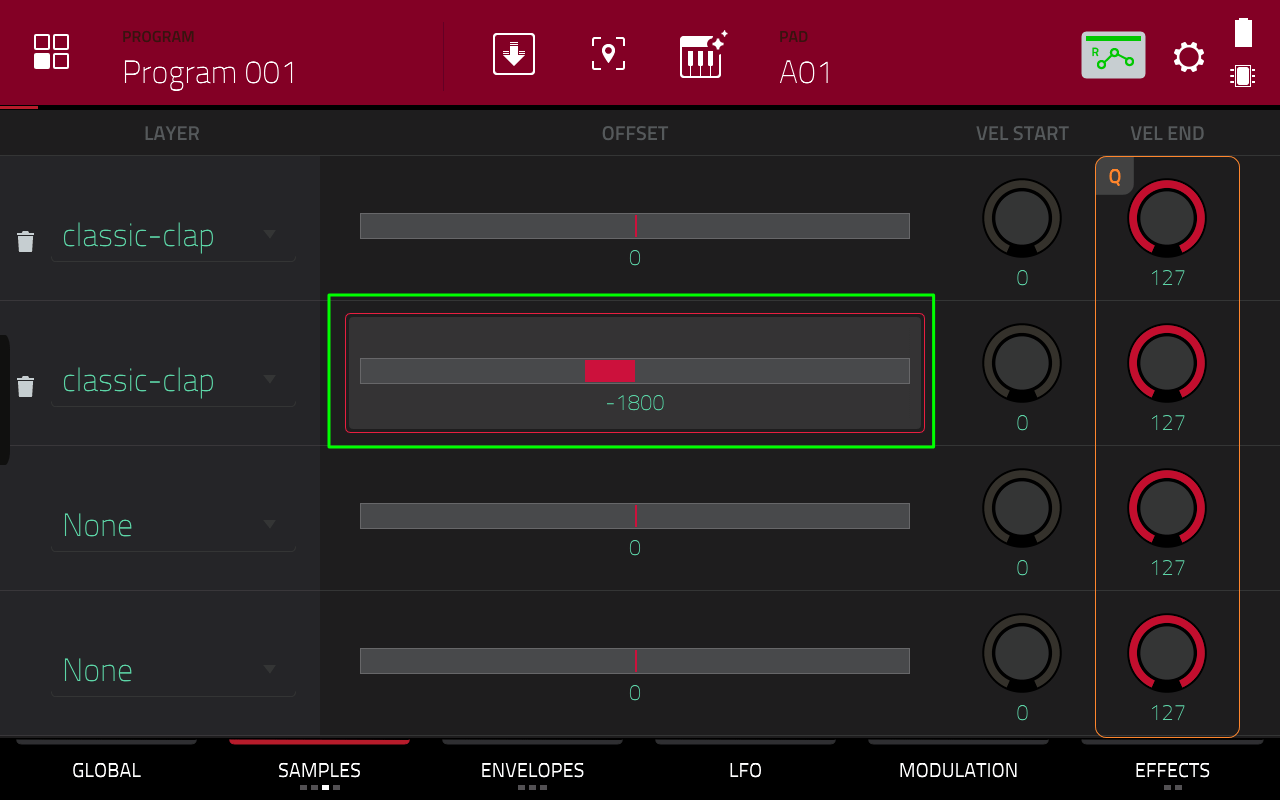
Hit the ‘SAMPLES’ button once again to enter the third SAMPLES screen:
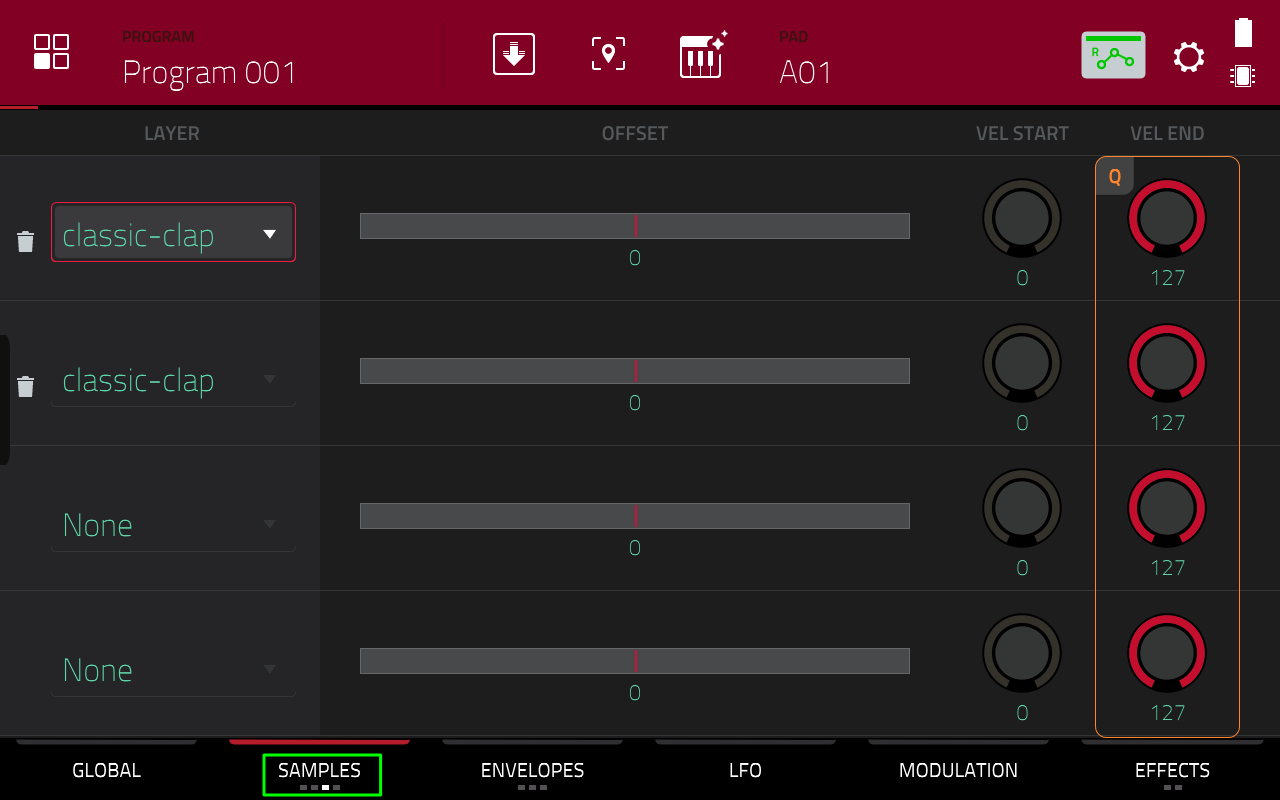
This is the OFFSET screen. Here we can ‘offset’ the two layers against each other, so rather than both layers play exactly in unison, the playback of one layer will be slightly delayed compared to the other. This will this create a nice ‘dragging’ effect.
To do this, tap the OFFSET parameter for LAYER 2 and start dragging the virtual slider to the left so the offset value is becoming increasingly negative:
If you find using your finger a bit too clunky on this dial, you can just single tap the slider and turn your data wheel anti-clockwise. This will adjust the offset in units of 100 (per wheel click). For even greater accuracy, hold down the SHIFT button while you turn; this will change the offset value in single units.
However, you can also use the Q-LINKS. If you have an MPC X you can see the current Q-LINK assignments displayed in the little OLED screen above each Q-LINK dial. But for the MPC Live/MPC One, simply hold down the Q-LINK button until the Q-LINK screen appears:
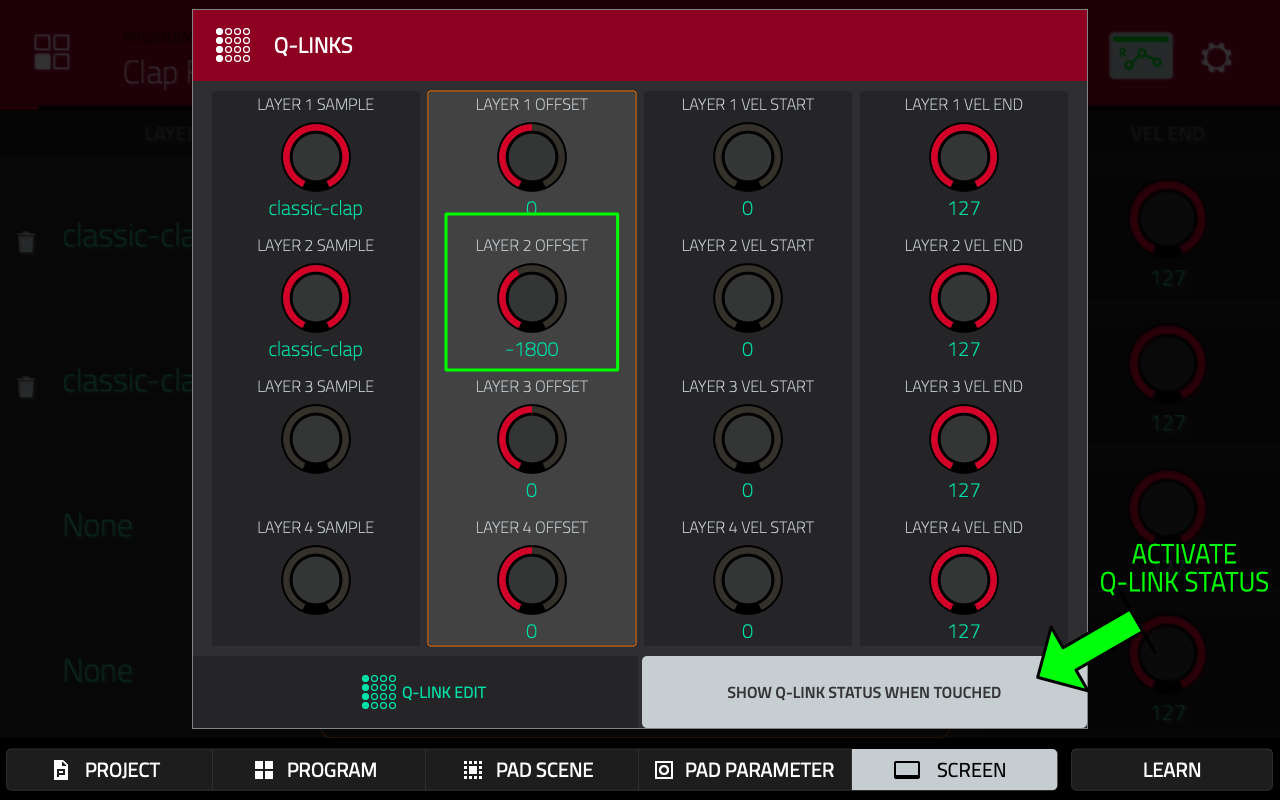
As you can see, to adjust the LAYER 2 OFFSET, turn the second dial from the top in the 2nd Q-LINK column (holding down SHIFT also improves accuracy with the Q-LINKS).
From the Q-LINK overview screen you can activate the setting ‘SHOW Q-LINK STATUS WHEN TOUCHED’ – now when you lightly touch any Q-LINK dial a status window appears at the side of the screen which shows the Q-LINK assignments for the currently selected Q-LINK column:

At lower negative values (e.g. -100), the two layers are just phasing, however as you reach -1200 or greater, the phasing is gone and now we are instead getting a different type of sound – the clap is now ‘dragging’, it sounds a lot thicker and has much more presence. If you set the offset too high it becomes less of a ‘drag’ and more of a ‘double’ (or a ‘flam’ in drummer terminology).
Set your OFFSET to somewhere around ‘-1800’.
Adding Some Effects
I’m pretty happy with the new ‘dragging’ clap, but let’s try adding a bit more grime to it to get things a little more nasty. First, let’s make a copy of pad A01 to pad A02.
Press and hold the physical COPY button on your MPC. This will bring up the COPY PAD screen:
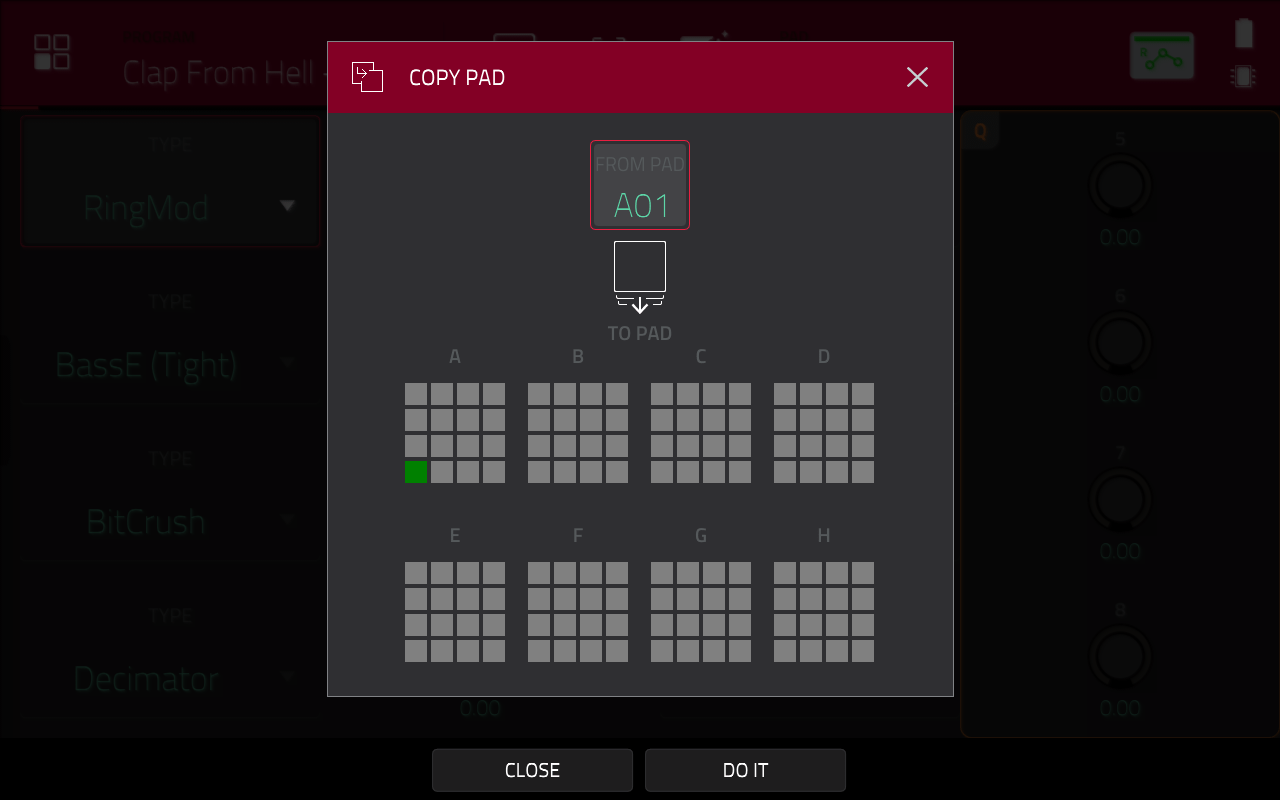
While still holding down the COPY button, tap on pad A01 so it turns green – the entire pad section should now become outlined in red:
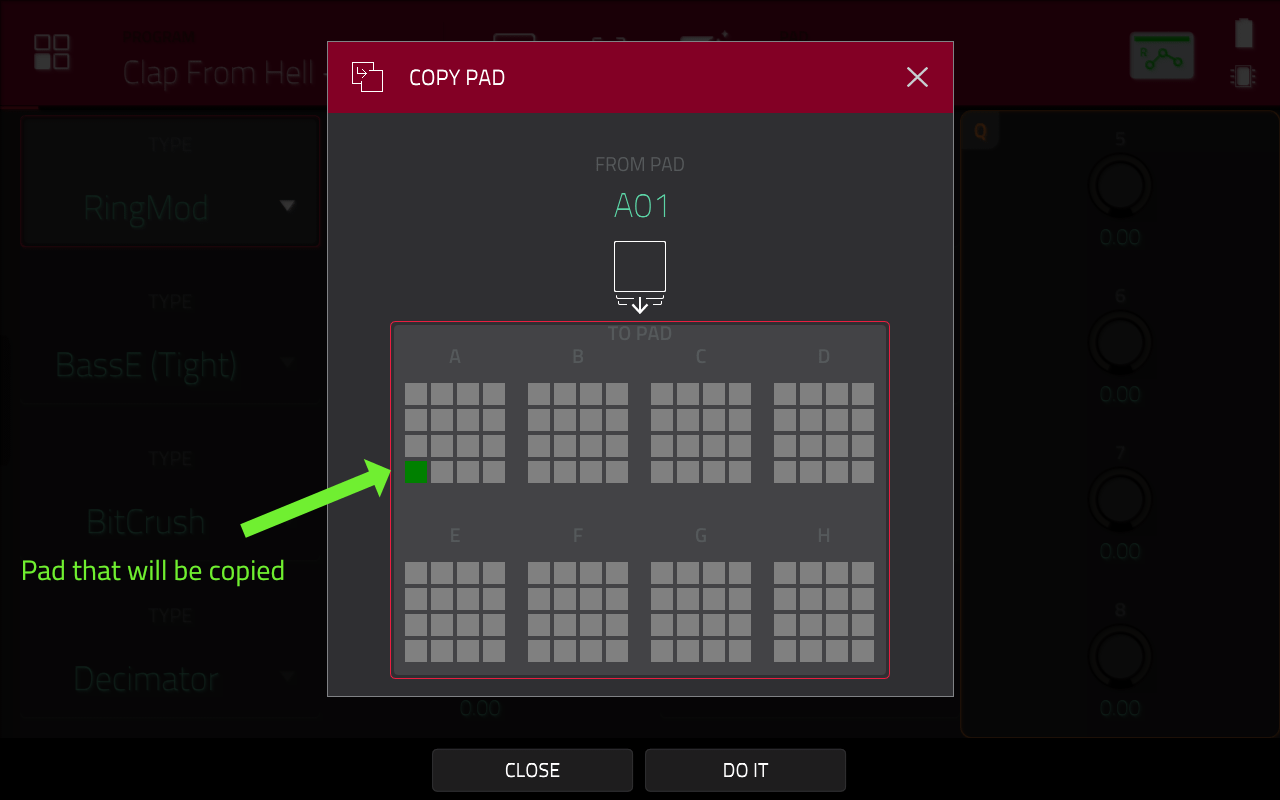
Tap on pad A02 so it turns red on screen – this is the pad to which you are going to copy to.

Release the COPY button to perform the paste procedure. You’ll be returned to the PROGRAM EDIT screen.
Hit pad A02 to confirm that A01 has been copied to it. Now press the EFFECTS button at the bottom right of the screen:
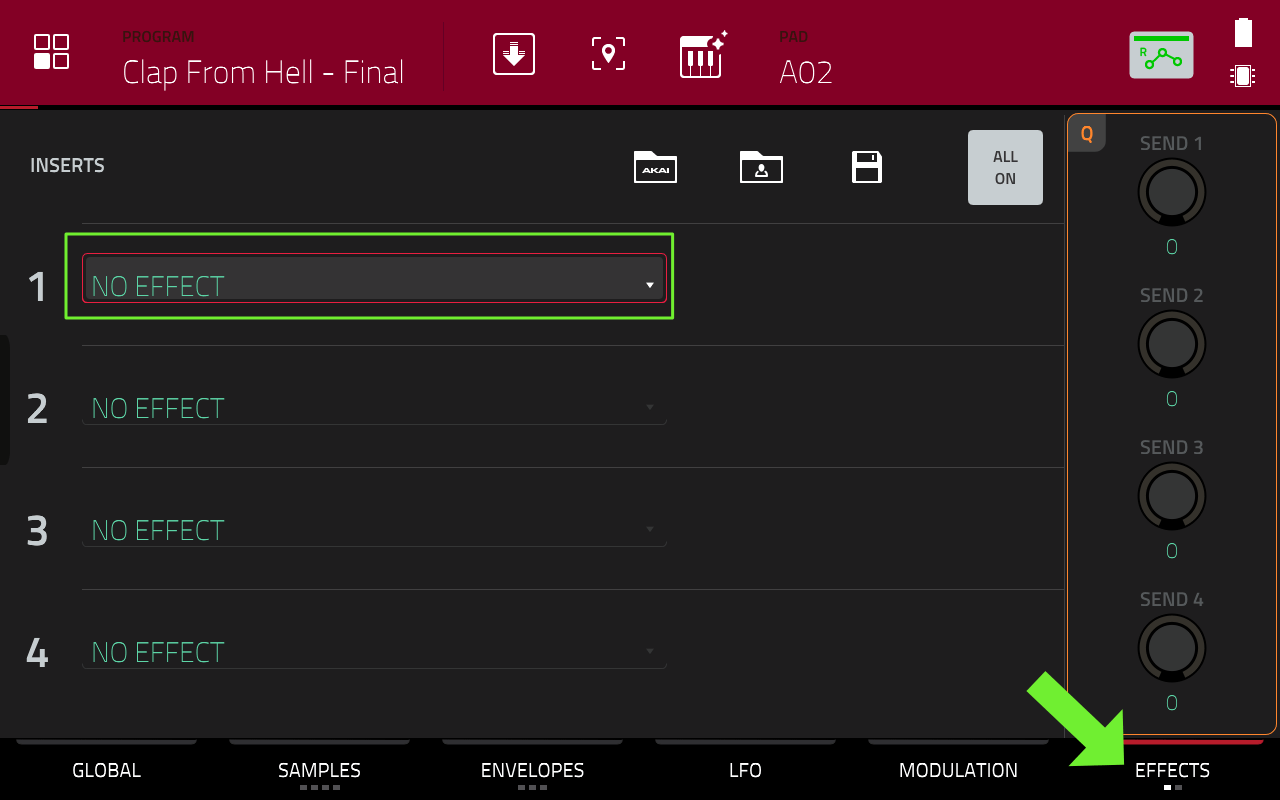
In the EFFECTS page we can insert up to four effect plugins on our pad – remember insert effects are applied to the entire pad, it’s not possible to add them selectively to individual layers.
The MPC has heaps of usable effect plugins built in and some of these are great for dirtying up our samples. Double tap effect INSERT 1:

With both the TYPE and MANUFACTURER buttons enabled, expand the Harmonic group, open the ‘Air Music Technology’ category and select the ‘AIR Flavor’ plugin.

Press SELECT and click on the pencil icon to bring up the settings for AIR Flavor. Try the following settings for this effect:
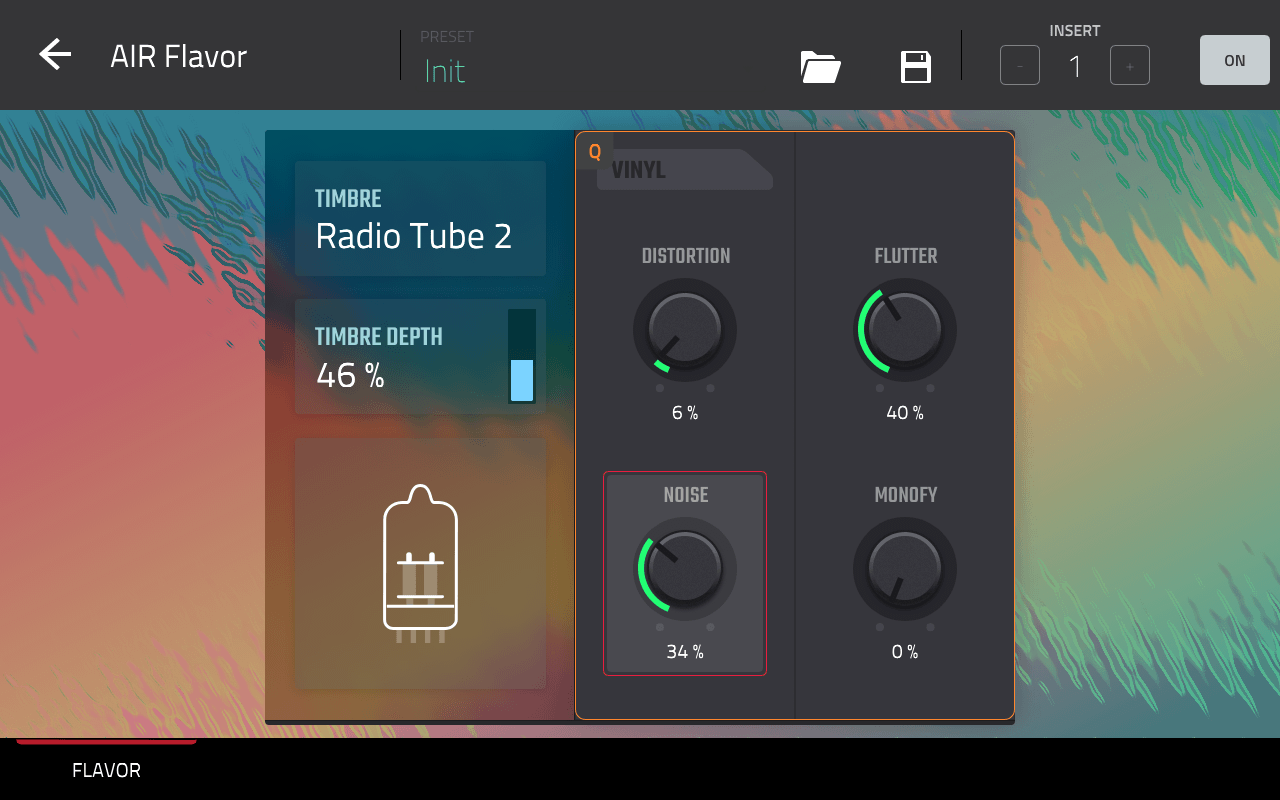
AIR Flavor lets you quickly add some vintage vibes to your sounds. The TIMBRE is basically an amp simulator, and the TIMBRE DEPTH controls how much of that amped signal is mixed with the original sound. DISTORTION controls the ‘aged’ vinyl effect and NOISE controls the amount of crackle.
FLUTTER is that distinctive ‘warble’ you hear on old cassette tapes and MONOFY will remove the stereo width from your sample (I’ve left that at 0 as I want to retain the stereo panning we set up previously).
Press CLOSE to return to the main EFFECTS page. Now let’s add a bit of vintage sampler emulation. Double tap INSERT 2, expand the ‘Vintage Effects > Akai Professional’ folder and select ‘SP-1200’:
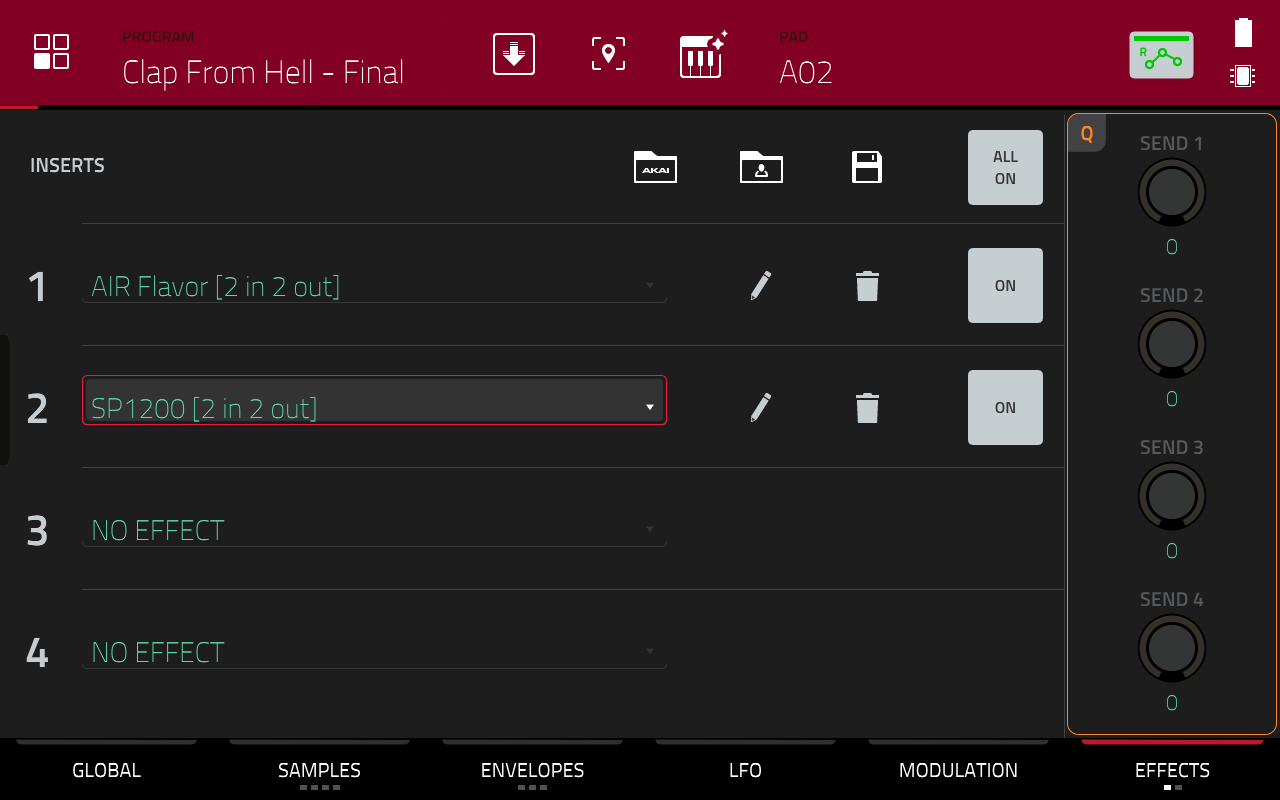
The SP-1200 plugin emulates the output of a classic EMU SP1200 sampler, adding both warmth and some subtle crunch. There’s no configurable settings for this effect.
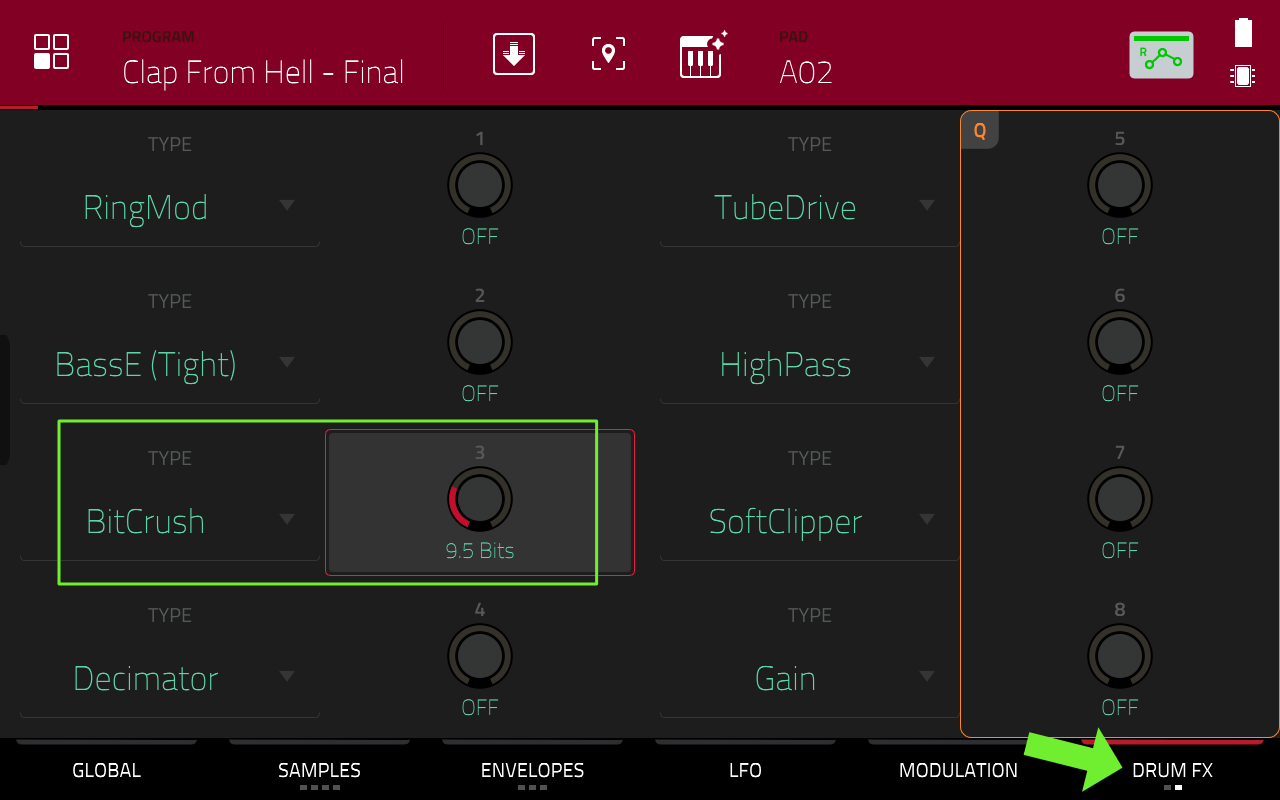
Now press the EFFECTS button once more to reveal the DRUM FX page, which contains eight ‘low CPU’ fx plugins that can be applied to your pads in addition to the 4 insert FX slots we looked at previously.
As you can see, drum FX have just a single parameter to control which makes them great for quickly adding some additional spice to your sounds. Turn the BitCrush dial to ‘9.5 Bits’ to give our sample even more lofi grit.
Finally, press the ENVELOPES button twice to enter the ENV: FILTER screen:
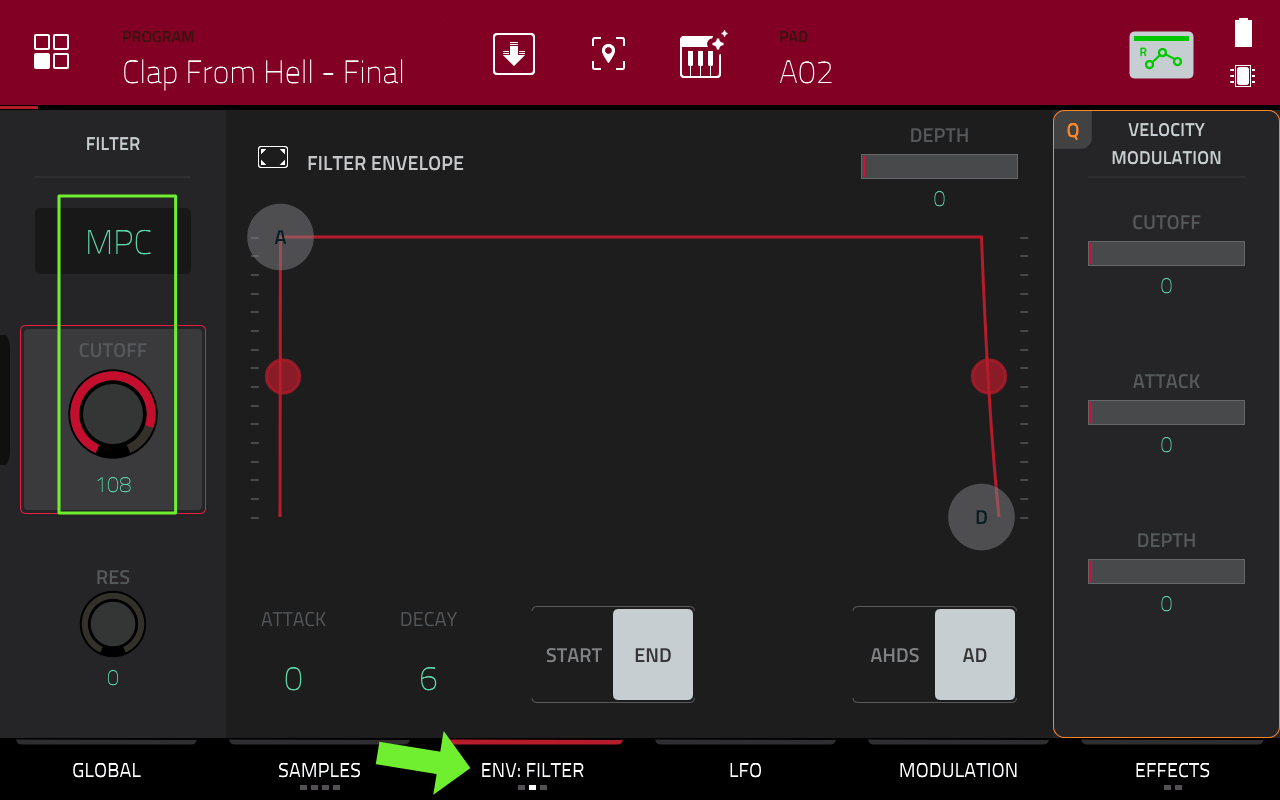
Here change the filter TYPE to MPC (an emulation of the MPC3000 low pass filter) and turn the CUTOFF down slightly to remove some of the harsh highs. At this point you could look at adding some dynamic FX and EQ to further shape and sculpt your sound – I talk about these in more detail in the MPC Bible.
The Next Step
Head back to the BROWSER where you can load up my final version of this program – ‘Clap From Hell – Final.xpm’. This has the initial layered clap on pad A01, the gritter version on pad A02 and for comparison the original (single layer) clap on pad A05. Which one do you like the best?
I cover hundreds more workflows and production techniques like this in the ‘MPC Bible’, the complete hands-on tutorial guide for the current generation of standalone MPCs – the MPC X, MPC Live, MPC Live II, MPC Key & MPC One.
2 Responses
Leave a Reply


Aug 4, 2022 9:26 pm
filter-4.png is in the wrong spot. 🙂
Aug 4, 2022 9:29 pm
Thanks you, that’s fixed now 🙂