Here’s a quick fix if you ever find that MPC features such as ‘Bounce to Audio’, ‘Flatten Pad’ or ‘Bounce to Sample’ have stopped working. Luckily this isn’t normally down to a bug or hardware failure, instead the solution is usually quite simple; your internal drive has probably run out of free space.
Basically for some rendering tasks (e.g. where the MPC has to ‘bounce’ data to create a new audio file) the MPC needs some free space on the internal drive to temporarily write the bounced audio file to disk (before transferring it into memory). If there’s no space to write that data to the internal drive it cannot perform the bounce. Unfortunately it often just fails silently without any on screen error message..
How to Check the Available Disk Space on your MPC Internal Drive
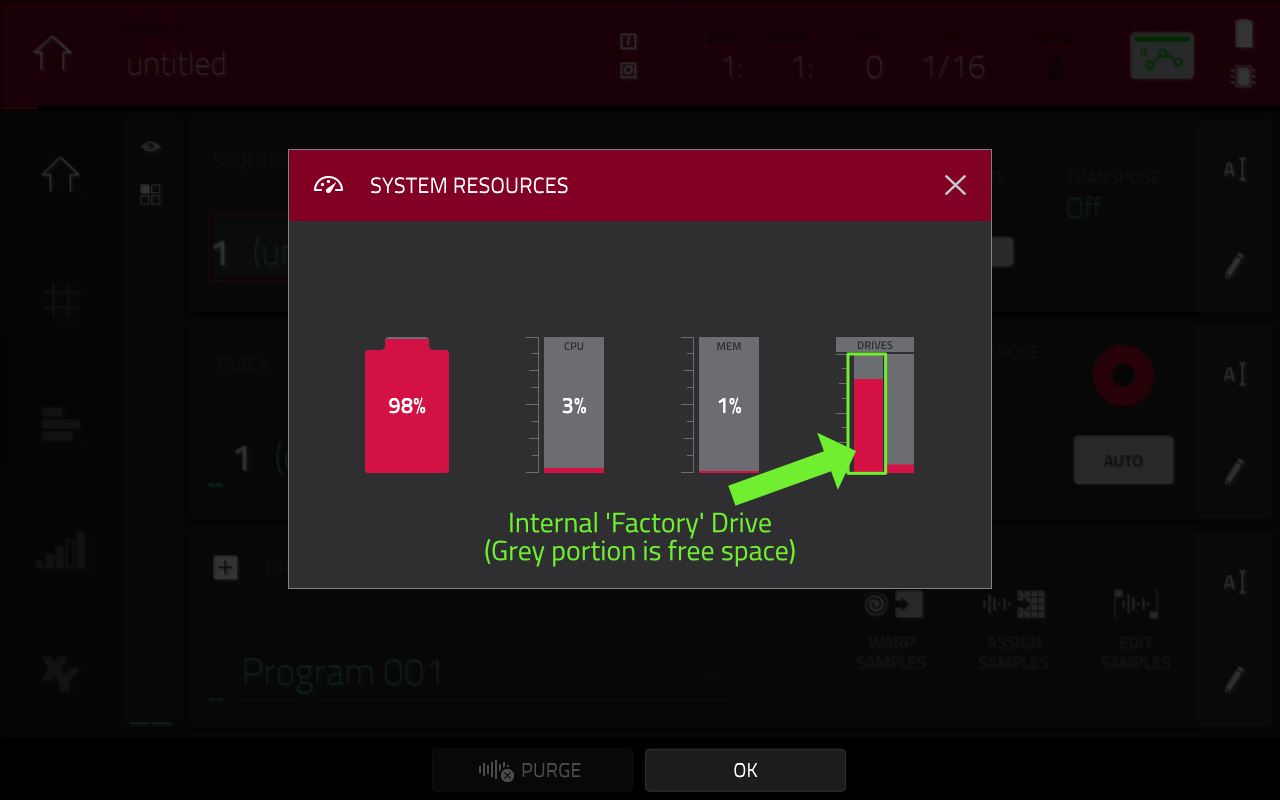
You can check the current disk usage by pressing the ‘system resources’ icon in the top right of most pages in the MPC firmware, or by tapping on the CPU/MEM display in MENU:
![]()
The key metric here is the ‘DRIVES’ icon – the internal drive is the first column and should need at least ‘some’ grey’ (empty) space available:
How to Free Up Space on the Internal Disk
To free up space you must delete files from the internal drive, but be careful what you delete! There are many reports online of people experiencing system instability after deleting factory expansions and demos, and this normally needs intervention from Akai support to resolve (you might be sent a link to a special installer that puts the factory content back in the correct place on their internal drive).
That said, some people have reported no problems whatsoever deleting factory content, so it’s still a bit of a mystery why only some people get so many problems when doing this, but in my opinion it’s not worth the risk. So instead of deleting the factory content, I recommend you instead move all of your own projects from the internal drive to an attached drive, such as a SATA disk (if your MPC supports this), SD card or USB drive.
Unfortunately moving content from the internal drive is a bit painful, but you should only need to do this once. Firstly, as you are probably already aware, you cannot access the internal factory disk via USB (i.e. from your computer in controller mode) as the internal drive is invisible, so any file management tasks must be carried out directly inside the standalone MPC itself.
The trouble is there’s no ‘move folder’ option in the browser, so we have to rely on a workaround. In the BROWSER, go to ‘ Places > MPC Documents > Projects’ and inside you should see all your custom user projects:
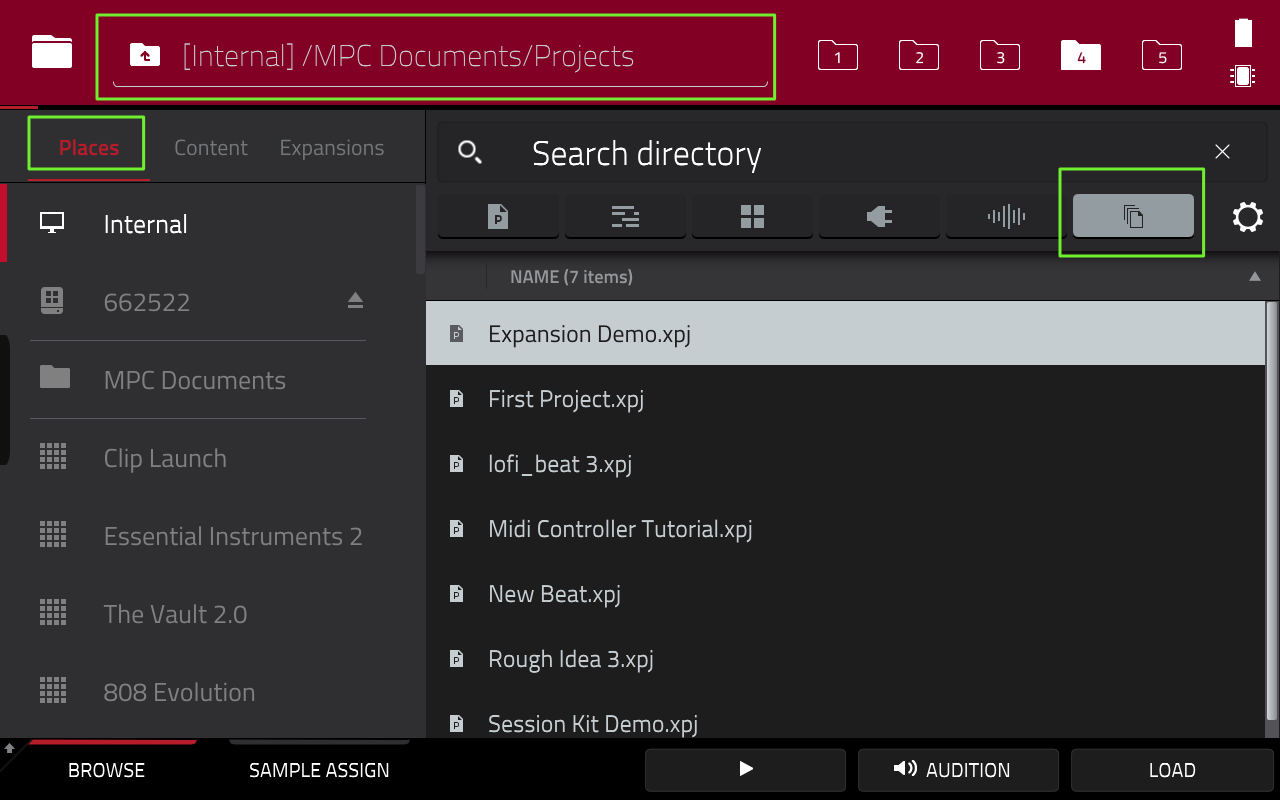
This is the ‘default’ project saving location – it’s possible that you might have chosen to save your projects elsewhere on the internal drive, so if that’s the case you’ll need to navigate there instead.
Next load up the first project into memory and then go to ‘ MENU > SAVE > Project As’. Now select your attached disk as the new save location for that project (I suggest placing it inside a dedicated ‘Projects’ folder). Repeat this process for all your internal drive user projects – yes, it might take a while!
Once they have all be saved and effectively ‘backed up’ to your attached drive, head back to the original location on the internal drive and delete all those projects. To do this, you could in theory just delete the entire ‘Projects’ folder, but it’s probably healthy to be paranoid about deleting this system created folder, so I would recommend you instead delete each individual project inside it.
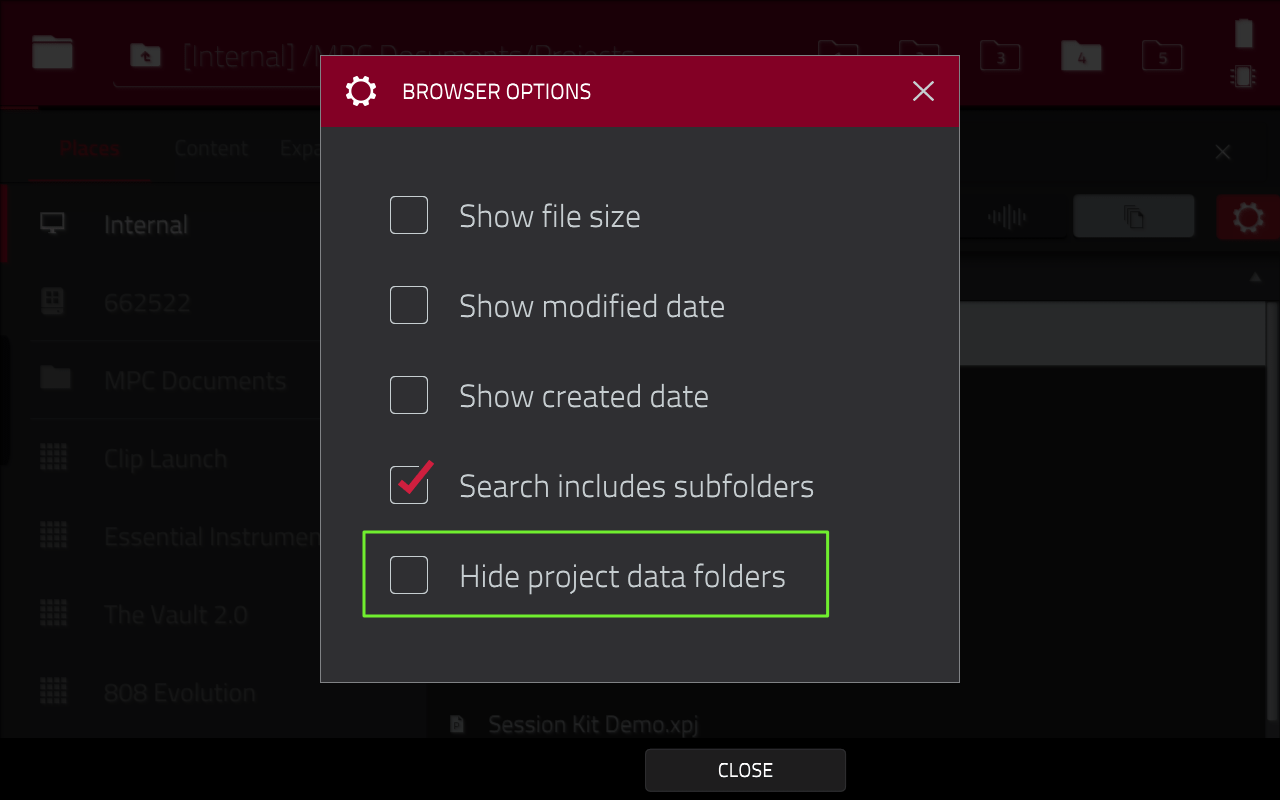
A project consists of an XPJ file (visible by default) and a hidden ProjectData folder containing all the samples, programs and sequences for that project. To make these ProjectData folders visible, tap on the gear icon in the browser:
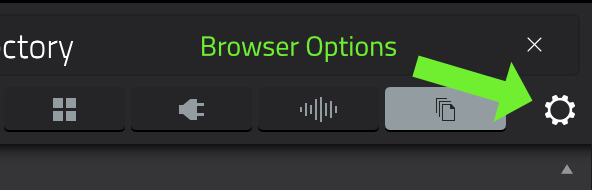
Now make sure you uncheck ‘Hide project data folders’:
Now you’ll see something like this:
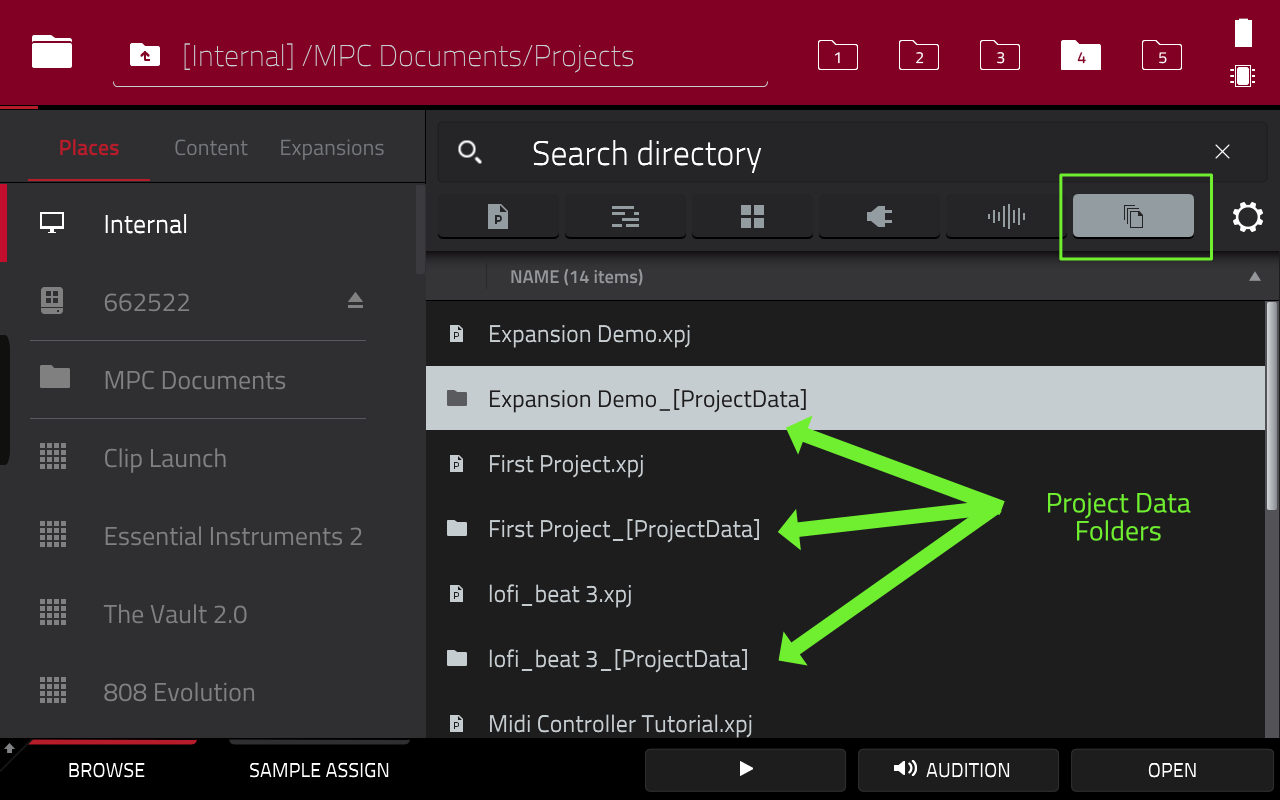
If you don’t see the ProjectData folders, make sure the ‘All Files’ filter icon is selected (and not the ‘Project’ filter). Tap on the first projectData folder and select SHIFT > DELETE FILE. Repeat for the other projects. You can also delete the XPJ files if you wish, although these will be taking up very little disk space. And that’s it – you should now have a healthy amount of free space on your drive. Just one more thing…
Long Term Solution: Don’t Save Projects to the Internal Drive!
Not only can saving projects to the internal drive eventually cause issues with core MPC functionality, it also makes backing up of your work a complete pain because as I’ve already mentioned, that internal drive is invisible while in controller mode so the only way to access any content on that disk is to load it into memory and re-save it elsewhere. Whichever way you look at it, saving projects to the internal drive is mostly bad news.
As such I really do recommend that you just leave the internal drive as a ‘read only’ drive for the factory content and just save all your projects, programs, samples and mixdowns directly to a different disk.
If you have the option of adding an internal ‘SATA’ disk, you should probably consider adding an exFAT formatted SSD drive internally. Otherwise a fast SD card or USB 3.0 drive will work well.
Now you can simply connect your MPC via USB and from the controller mode (or MPC Software) browser navigate to your standalone MPC disk and load up and continue working on your standalone projects in the MPC Software environment.
And while you are connected you’ll also be able to backup up your MPC projects, as well as add new sound content to your standalone MPC disk using your computer’s ‘Finder/File Explorer’, just like you would with any other removable drive.


Leave a Reply